The Editor
Objects
Reminder: Hover your mouse over almost any input, field, selectionbox or button in the Editor to receive tooltips and examples.
Table of contents
What are Objects?
In Adventures of Conquest, a Map consists of 4 things:
- Maptiles
- Entities (NPCs, Monsters, the Player...)
- Items
- Objects
Objects are for Interactions, Events and Map Functionality.
An Object could be a lever that opens a door, or a campfire that allows you to bake bread, or an invisible trigger that you step on that starts a cutscene, or it could be an animated light source.
Placing Objects
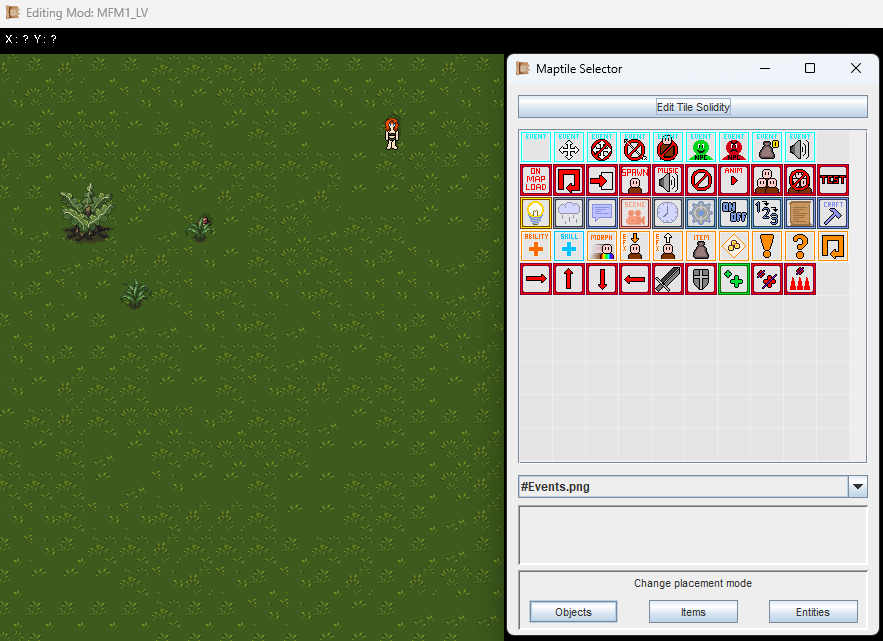
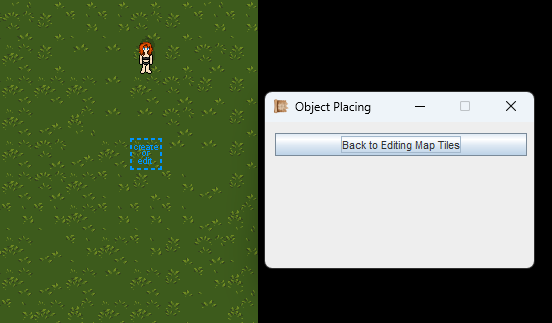
The Object-Button is in the Maptile Selector, bottom-left. This will put you in Object-Mode.
One last time we return to the Map Editor. In the Maptile Selector Window you will find the 'Object'-Button at the bottom-left. Click on it to start placing/editing Objects.
You can also right-click an existing Object to copy&paste it.
As with Items and Entities, your cursor will now look different. If you click on a tile with no Object on it, you will create a new one. If there is an Object on it, you will edit it instead.
Object Settings
Objects are one of the most important things in the Editor.
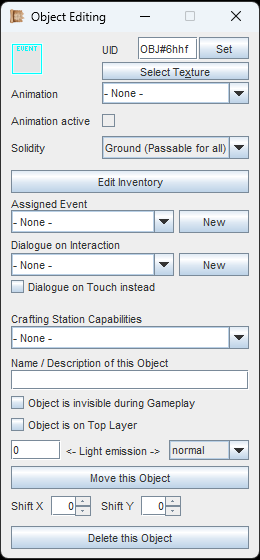
Once you have placed an Object on your Map (or edit an existing one), this window here will appear.
At the top-left you see the Object's current Texture. If you click on 'Select Texture' you can pick a new one. Objects use the same Textures as Maptiles. Remember all those colorful icons when you looked at the Maptile Selector? Those are actually made for Objects with Events, so the Modder (You) can easily see what these are for.
Below the texture button, you will find the 'Animation' dropdown. Here you can select an Animation that will play. Ideally, you want to select an Animation that loops. If it should be playing right away, click on the 'Animation active' checkbox. While the Animation plays, the texture will not be shown. Animations can be activated/deactivated or changed via Events.
The 'Solidity' dropdown offers the same options as for Maptiles: 'Ground', 'Wall', 'Wall for Entities only', 'Wall for Projectiles only' and 'Passable underneath'.
You can add Items to an Object, e.g. to create a container. Simply click the button 'Edit Inventory'. Looting it requires a simple Event though.
Objects are heavily used as triggers for Events. More about that below and when we get to Events. You can also assign Dialogue to Objects, which is shown when interacting with the Object (or on touch, if you click the checkbox). If both an Event and a Dialogue are attached to an Object, the Event always gets executed first.
Every Object can act as a Crafting Station, simply select one from the dropdown as needed.
The 'Name/Description' of the Object is text that will be shown when the player hovers the mouse over the object in-game.
The Object can be invisible during gameplay. This is especially needed for invisible triggers or adding map functionality. All those colorful default icons in the Maptile Selector are meant to be invisible during gameplay.
An Object can be put on the 'Top Layer', to be shown on top of Top-Layer Maptiles. Otherwise, the Object will appear underneath them. Example: Putting a barrel of wine (that's the Object) on top of a table or underneath it.
Any Object can emit light, either bright light or dim light. Light can also pulse or flicker. More about that further down on this page.
With the 'Shift X' and 'Shift Y' adjustments, you can move the Object pixel by pixel. Useful for exact placement. Just keep in mind that it technically is still on the tile you placed it on originally.
Objects as Triggers (Events)
Without going too far into the topic of Events yet, you should know that Objects (visible or invisible) make for excellent Event-triggers. Here are two examples:
Example 1
You create an Object and set its solidity to Ground, so you can walk over it. Then you set it to 'Invisible during gameplay'. Finally, attach an Event that has an 'on_touch'-trigger. Once the player walks over it, the Event will trigger. You can then right-click the Object to copy it and cover a whole area as needed.
Example 2
You create an Object and set its solidity to Wall. Then you give it the Texture of a lever. You give it the Description 'Lever'. Finally, attach an Event that has an 'on_interact'-trigger. Once the player interacts with the lever, the Event will trigger. The Event could then change the texture to a pulled lever, and do something else like e.g. open a secret passage.
Textures and Animations
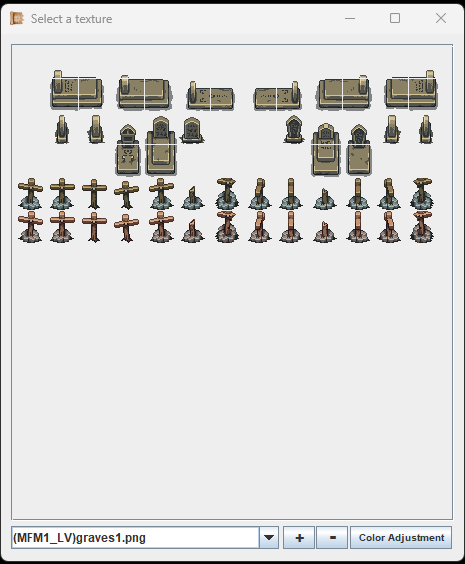
Selecting a texture for an Object uses the same tile sheets as for Maptiles.
Selecting a Texture for an Object is very straight-forward. Objects use the same textures as Maptiles, so you simply have to pick one of your tile sheets. In case of Objects, you can even do some Color Adjustment.
Since Maptiles are 32x32 pixels big, Object textures can also only be 32x32 pixels. If you still need bigger Objects, you might want to look into single- and multi-frame Animations, explained below.
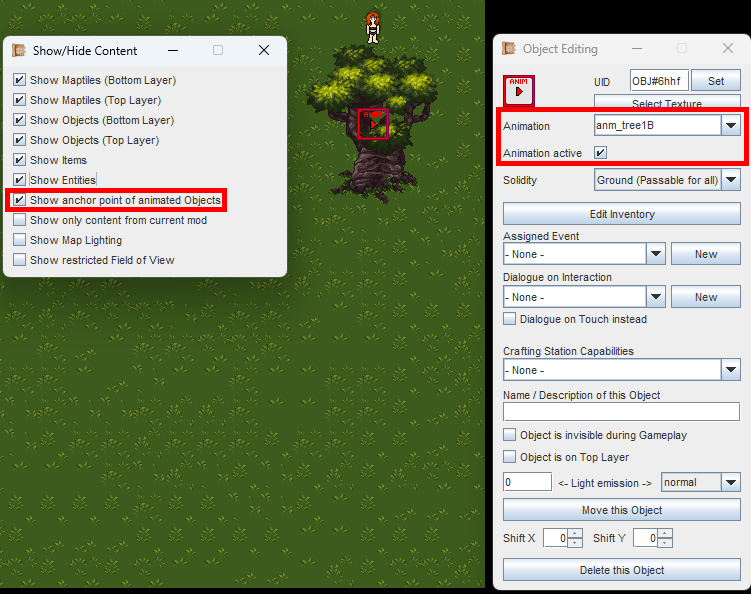
In the Editor, you can choose to 'Show the anchor point of animated Objects'. That way, you know where to click, when wanting to edit the Object again.
If you select an Animation instead of a Texture, and set the Animation to be active from the start, it will override the Texture.
In the image to the left, you can see that I have used an animated tree. Animations can be much bigger than normal Object-textures, which are limited to 32x32 pixels.
You can create a looping 1-frame Animation (basically an image), and use it for an Object. That way you can use a large texture. But: Keep in mind that the Solidity only affects the singular tile where the Object is on. In the image to the left, the player could technically walk through the bottom part of the tree. You can address this, by creating new invisible Objects with a 'wall' solidity, which you place where the player is not allowed to go.
Description
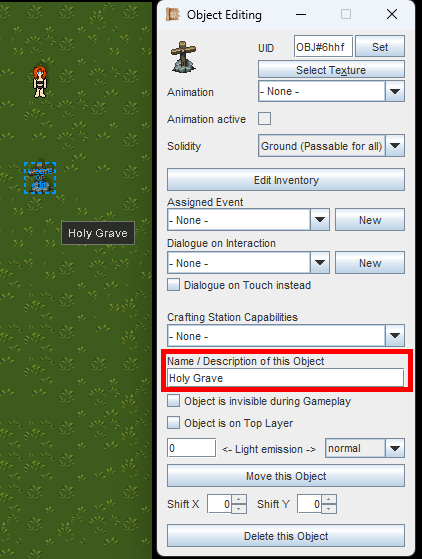
Description text can also be previewed in the Editor by hovering over the Object.
In the image to the left you can see an example of how the description appears in the game. When the player hovers the Object, they will see it.
In this example, we have created an Object with the texture of a grave, and gave the description 'Holy Grave'.
Crafting Stations
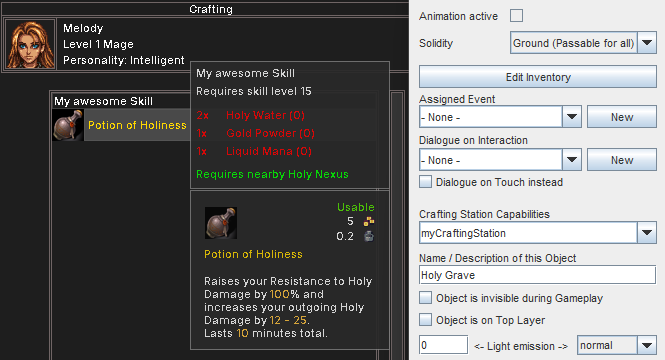
A potion that can only be crafted while near the selected crafting station.
As mentioned earlier, you can give any Object the capabilities of a crafting station.
In the example to the left, we gave the 'Holy Grave' the crafting station 'Holy Nexus'. The recipe we want to craft requires exactly this 'Holy Nexus' crafting station. If the player stands next to it, the recipe will become craftable.
Light Sources
If you want to see light in the Editor, make sure you have the right conditions for it.
Objects are prime candidates to be light sources. But before we add any, we should make sure that we actually see the light.
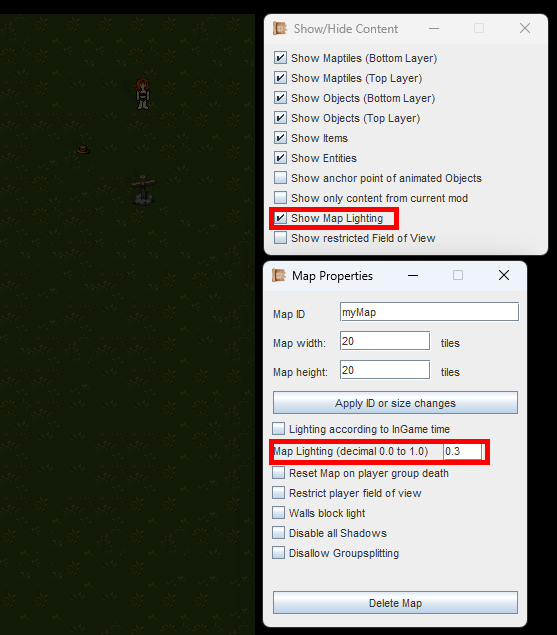
Make sure that you have 'Show Map Lighting' active in the Editor. This is only for the Editor, so you can quickly preview how the lighting will look like.
However, if you add a light source to a bright map, you won't see much of a difference. Try to reduce the Map's base lighting, or set Lighting according to the in-game time and then press the 'Home' and 'End' keys in the Editor to change the time.
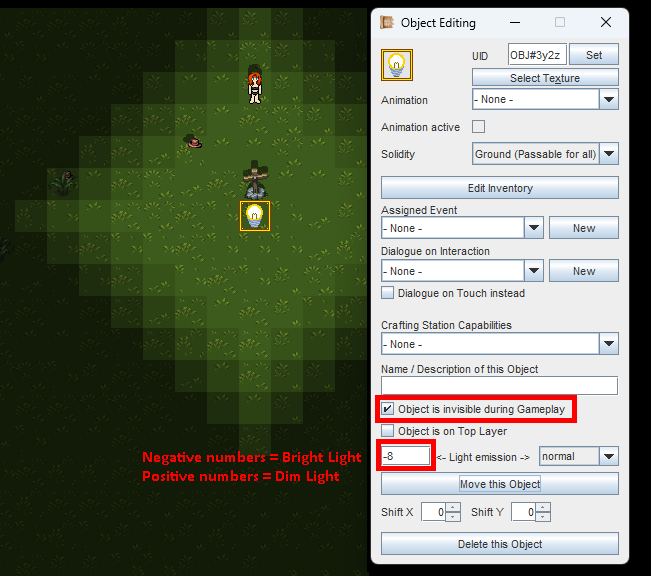
Negative numbers for lighting equal to bright light.
In the image to the left, I have used a 'lightbulb'-texture, but this will be invisible during gameplay. It is mainly done to help me while in the Editor.
For the lighting value, I have set -8 . Negative numbers mean bright light. You can immediately see how it looks like when adjusting it.
The dropdown to the right of the lighting value can be set to make the light 'flicker' or 'pulse.
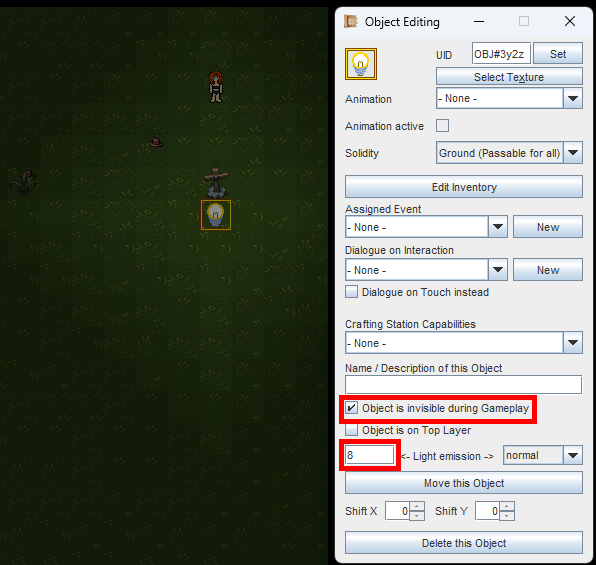
Positive numbers for lighting equal to dim light.
Now let's try a positive value, like 8. Positive numbers mean dim light. You can immediately see how it looks like when adjusting it.
The dropdown to the right of the lighting value can be set to make the light 'flicker' or 'pulse.
Shadows
Shadows can be disabled in a Map's properties.
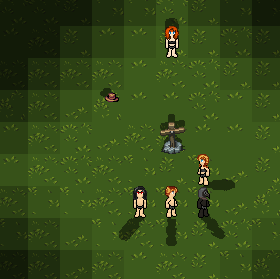
Unless you have disabled it in your Map's properties, the game will automatically create shadows for Entities, Items and Objects.
Our light source is invisible and situated between the player characters.
Shortcuts for Object Placement
While in 'Object-Placement-Mode', you can
- Right-Click on an existing Object to go into Copy&Paste mode.
- Hold the Deletion (Del) key on your keyboard and left-click an existing Object to quickly delete it (or multiple).
If you are following the Guide, continue with Player Personalities.