The Editor
Maps
Reminder: Hover your mouse over almost any input, field, selectionbox or button in the Editor to receive tooltips and examples.
Table of contents
The Mapping Tools
With your mod loaded, select 'Map Tools' in the Editor's main menu, and you should see the following view. The name of your Mod will be displayed at the top of the Editor's main menu and in the title of the render window (the one in the middle). Since this is MyFirstMod by LordVollkorn, I gave it the unique mod ID 'MFM1_LV'.
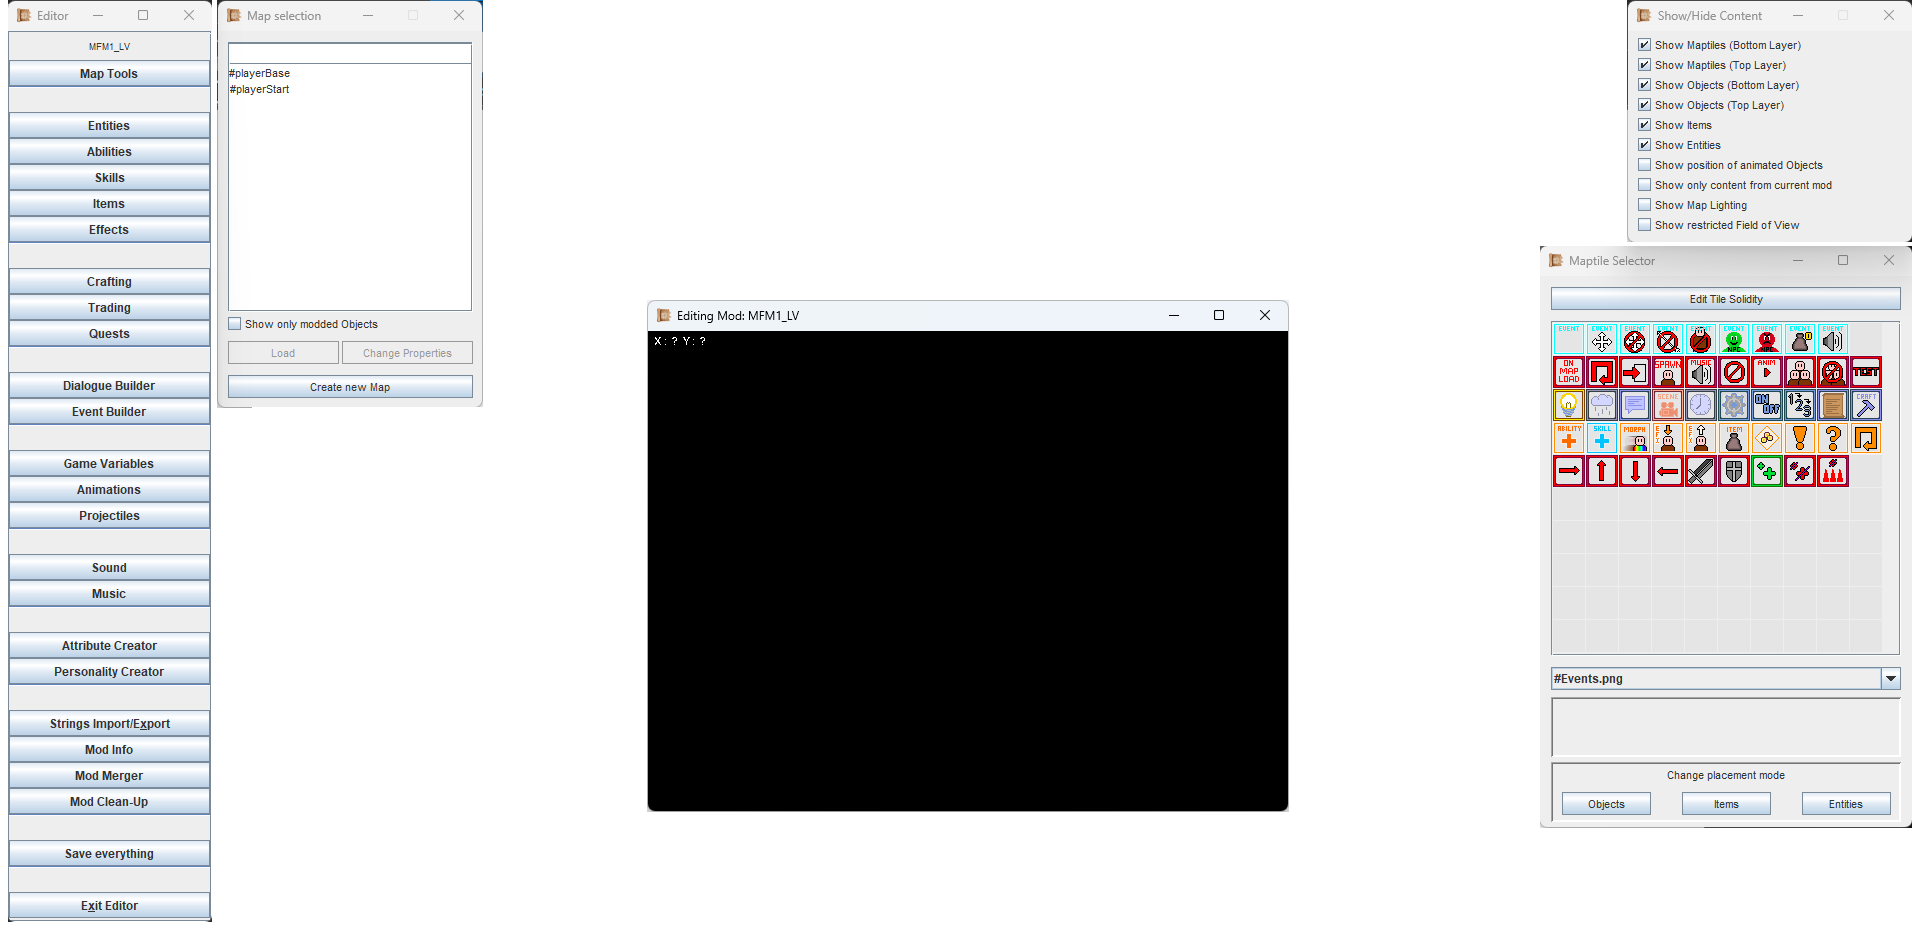
- The window in the top-left (next to the Editor's main menu) is the selection window. Here you can load a map, create a new map and edit the map's properties.
- The black window in the middle is the render window. Your map and some previews (e.g. of item descriptions) will appear in here. When a map is loaded, it also shows the coordinates of the current map tile your mouse cursor is on.
- The window on the top-right is for showing/hiding certain things in the render window. This is very useful when working on a map, or testing how the lighting looks like. These options have no influence on the gameplay later, purely meant for the modder.
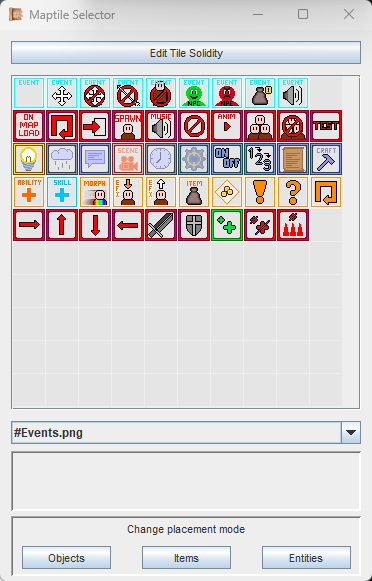
- The window on the bottom-right is the Maptile Selector. Here you pick your maptiles and draw them onto the Map, and set their solidity as needed. You also have some buttons to place Objects, Items and Entities (but we save those for later).
There are a bunch of Controls and Shortcuts (like CTRL+Z) available in the Map Editor. These are explained further down on this page.
The Selection Window
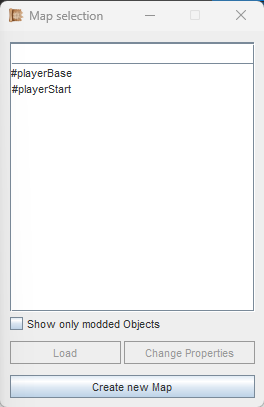
The Map Selection Window with two (vanilla) maps already present.
Everything starts here. You will see a list of all Maps from the Vanilla Game (the 'Master') and from your Mod. The checkbox below will let you see only your own Maps, from your current Mod.
Select any Map in the List and you can load it or edit its properties. In the properties menu you can also change the Map's ID and size, or you can delete it.
The Render Window
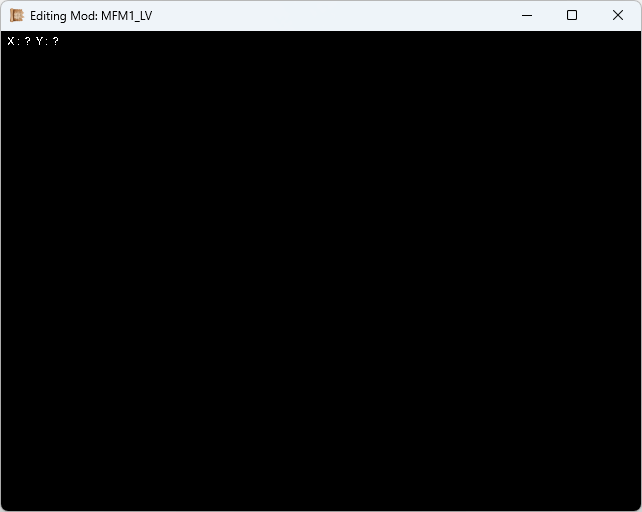
The render window always starts out empty.
This window always starts out empty. In here you will see any loaded Map, but also previews for Items, Abilities & Animations.
Once a Map is loaded, the X- and Y-coordinates will show which map tile you are hovering with your mouse. This will be useful for Events later on, e.g. moving an NPC to a X/Y position in a cutscene.
The title of the window always includes your mod name.
The Show/Hide Content Window
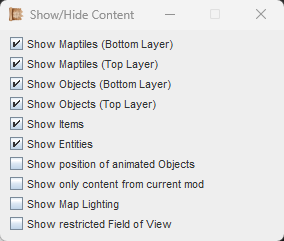
This window only affects the modder's view.
This window contains a bunch of checkboxes that allow you to make certain things visible or invisible while editing a Map.
Imagine you want a quick overview of all the Items you placed on a Map. Then you simply uncheck everything except 'Show Items'.
This functionality is only visible to the modder. It has no effect on the gameplay later on.
The Maptile Selector Window
We will come back to this window multiple times.
We will get back to this Window multiple times on various pages, but for now we focus on this Window for creating/editing map tiles.
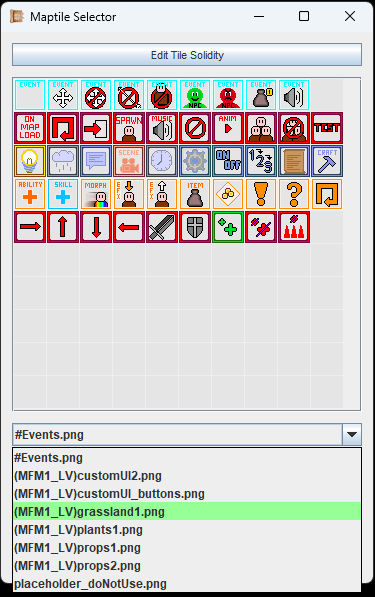
When it starts up, you will see a bunch of map tiles that resemble icons. However, these inherently don't do anything on their own, and are used for a different purpose. You can see that when you read about Objects.
First, you want to select a tileset from the dropdown list. If you have added any tilesets to your '...mods/[YourMod]/gfx/tileset' folder, they will appear in here. You can then click on any tile to select it, and draw with it inside the render window.
More about these functionalities will be explained further down on this page.
Creating a Map
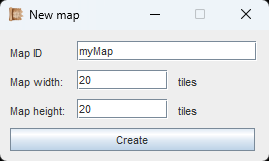
Clicking on Create will create the map and load it in your render window.
Creating a map is simple enough: You only need a unique ID, width and height. Once done, the map will immediately be loaded in your render window.
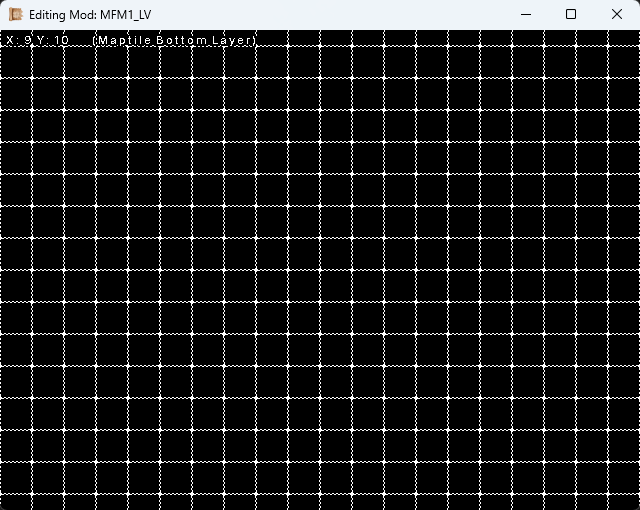
What an empty map looks like. The dashed tiles won't be visible in the game later.
Every empty map looks kind of like this. The dashed tiles symbolize an empty space, and they won't be visible in the game later. The game will render them as a black void.
Moving the mouse inside will already show you the current mouse coordinates in the top-left.
The field of view might be a bit too small for you, but don't worry, we can fix that. The controls are explained below.
Editor Controls & Shortcuts
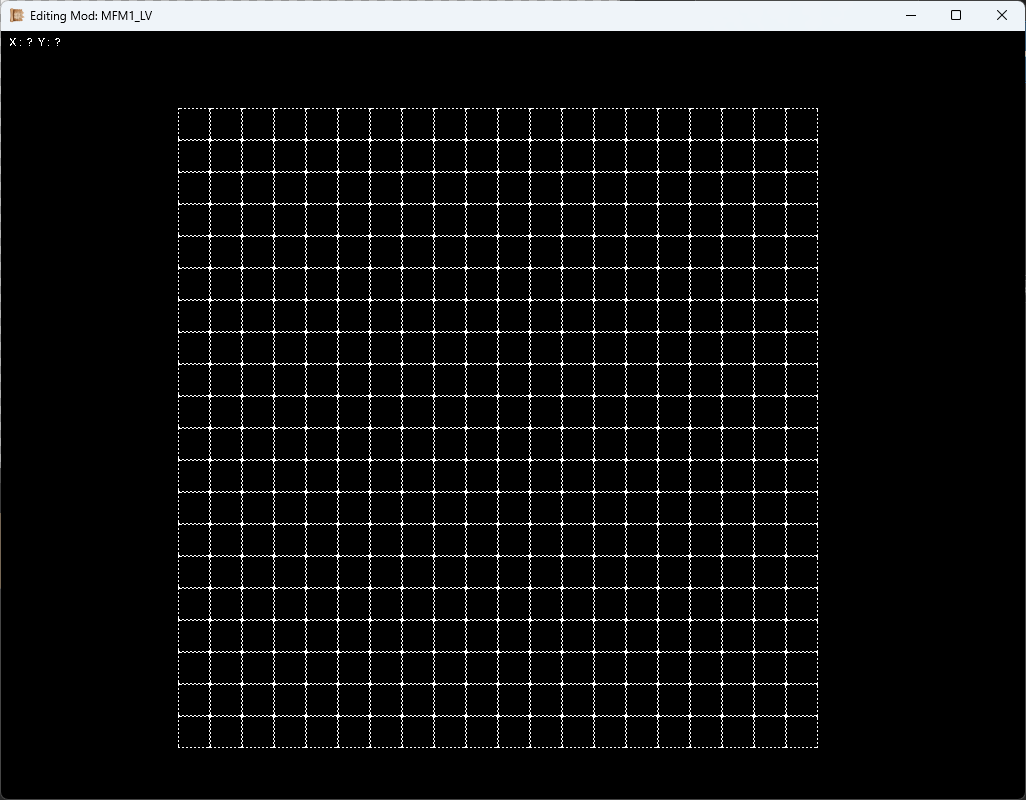
Press the Plus or Minus key to increase/decrease the field of view.
While inside of the render window, you can make use of these important controls:
W,A,S,D
These move the camera. Hold down Shift to speed it up.
Plus, Minus
These increase/decrease your field of view. Good for big maps.
Left-click
Places the tile you have currently selected. Places an empty tile if you don't have anything selected.
Right-click
Selects the tile you clicked, so you can place more of it.
Shift + Right-click
Selects the tile you clicked, so you can place more of it,
and loads the tile sheet it originates from.
Up, Down (Arrow-Keys)
Increase/Decrease your brush size, so you can place the selected tile multiple times at once.
Delete-Key + Left-click
Hold the delete key while clicking to remove the tile you are on. This also works when placing other things (Objects, Items & Entities).
PageUp, PageDown
Switch between the Bottom- and the Top-Layer.
This is also displayed next to the tile coordinates.
CTRL+Z / CTRL+Y
Undoing or Redoing your actions inside the render window.
Home, End
Change the simulated time of the Editor (some Maps calculate light according to the time, see map properties for more)
Placing Maptiles
Your own tile sheets have your mod as prefix, so you can't confuse them.
First, select a tile sheet from the dropdown. If you have added any tile sheets to your '...mods/[YourMod]/gfx/tileset' folder, they will appear in here, along the vanilla tile sheets.
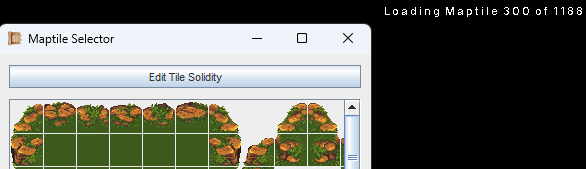
The loading progress of your tiles is displayed in the top-right corner of your render window.
After selecting a tile sheet, it will take some time to load. You can see the progress at the top-right corner of the render-window.
If you create tile sheets yourself, consider splitting them up across multiple files. You can still use all of them on the same map.
To quickly paint a large area, increase the brush size with the Up- and Down-Arrow-Keys on your keyboard.
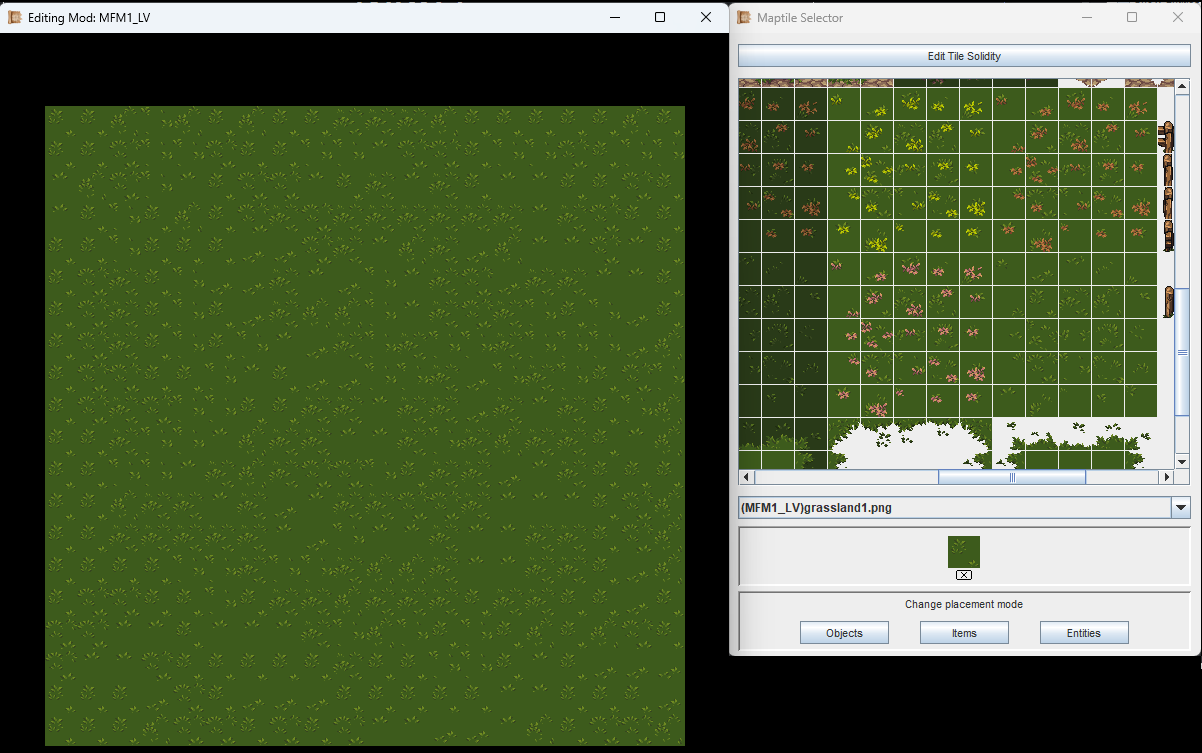
In your Maptile Selector, click on any tile to select it. You will see the currently selected tile in the preview at the bottom of the window, along with a little 'X'-symbol.
You can now paint this tile onto the map, using the controls previously laid out on this page.
If you press the 'X'-symbol, you no longer have your tile selected, and will place empty tiles instead. You also place empty tiles when you hold the Deletion-key and left-click on a map tile.
Multiselect Placing
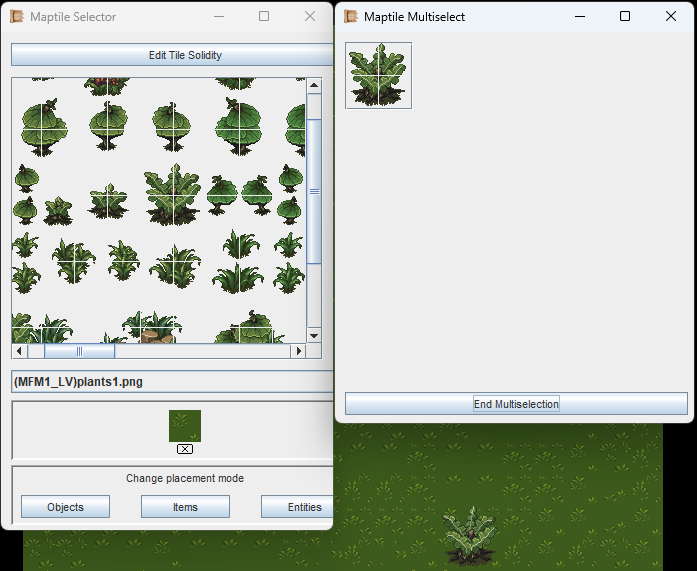
In this example, a plant consists of 4 adjacent tiles.
Sometimes you want to place down many tiles at once. The Editor supports selecting multiple tiles that are adjacent to each other.
Inside of the Maptile Selector, hold your Shift-key, then hold left-click and drag across all adjacent tiles you want to select.
A new preview window will automatically pop up and show you what you are going to draw when clicking on your map. To end this mode, click on the button in the preview window.
Top- and Bottom Layer
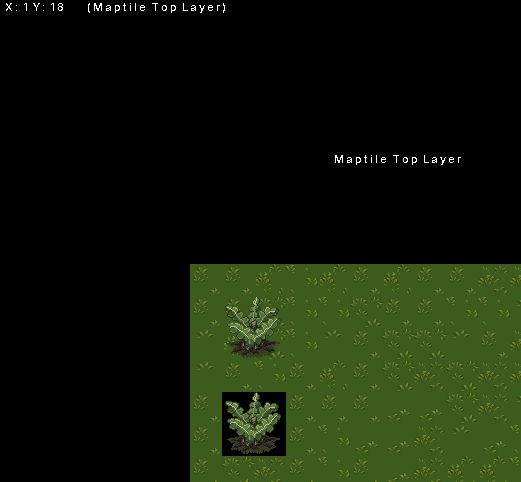
The lower plant is placed on the bottom layer, replacing the grass tiles. The upper plant uses the top layer, which is the correct choice for anything with transparency around it.
The Editor has a Bottom- and a Top-Layer.
The Bottom-Layer is intended for floors and walls.
The Top-Layer is intended for anything with transparency around it.
To switch between them, use the PageUp- and PageDown-Buttons on your keyboard. The top-left corner of the render window always displays which layer you are currently editing.
If two layers are not enough, 'Objects' might be a good choice, but those have their own page.
Solidity (Collision)
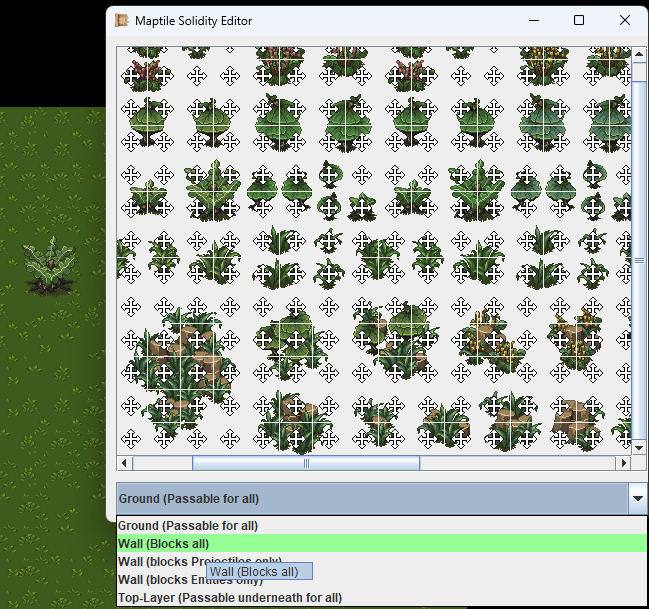
Select the solidity type you want from the dropdown menu first. Then click on the tiles you want to apply this to.
Every single map tile can have its own collision (solidity) type. This determines if your player characters and the NPCs can walk over them, under them or are blocked entirely.
To edit your currently opened tile sheet's solidity values, simply press the button 'Edit Tile Solidity' in the Maptile Selector. Then, select a solidity type in the dropdown menu as shown in the image. Finally, click on all the tiles you want to change to this solidity.
There are 5 solidity types:
Ground
The default value. Entities (Players and NPCs) can walk over this.
Wall (Blocks all)
A simple wall. Cannot walk or shoot through this.
Wall (Blocks Projectiles only)
A tile that you can walk through, but cannot shoot through.
Niche, but e.g. for magical fields.
Wall (Blocks Entities only)
You cannot walk through this, but projectiles can pass.
Used for water, or cliffs, or holes, or small fences/walls.
Top Layer (Passable underneath)
The same as Ground, but you will walk underneath it (its rendered on top)
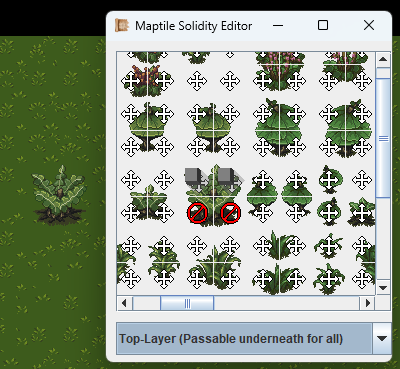
The plant from earlier now has different solidity values.
In the image to the left, the big plant consisting of 4 tiles has the two upper tiles marked as 'Top Layer (Passable underneath)' and the two lower tiles marked as 'Wall'.

Solidity values demonstrated.
With the adjustments made as describe above, our player characters can now walk underneath the upper part of the plant, which gives the illusion that they walk behind it.
The lower part is completely blocking them though.
The little plant at the bottom still has the default 'Ground' value assigned. So our 2nd player character can stand on it.
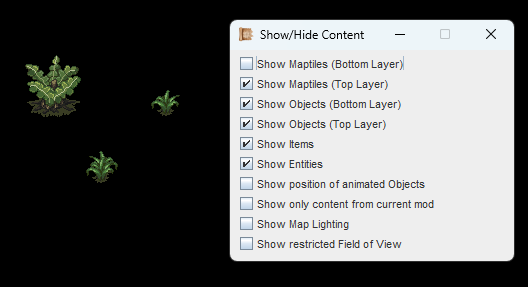
Show/Hide Maptile Layers
Keep reading to understand what all of these do.
The Window for showing/hiding content is very useful for creating maps. This functionality is only visible to the modder. It has no effect on the gameplay later on.
These checkboxes are more or less self-explanatory. If they aren't, you will understand them once you learned about Objects, Items and Entities. Keep reading on this page for the other ones.
Map Properties
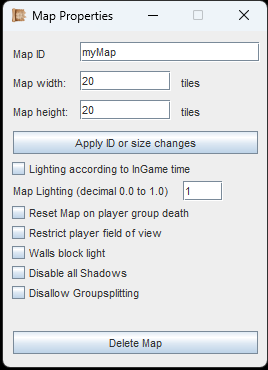
Keep reading to understand on this page for all these options.
After creating a map, you can click the 'Change Properties' button in the Map Selection Window. In here you can change the Map's ID and size.
There are a couple more options though.
Lighting according to InGame time
The game has an internal clock. Every 5 seconds is a minute in the game. And with this checkbox, the lighting of the Map changes automatically according to that clock. Bright during the day, dark during the night. Best option for most outside maps.
Map Lighting (Decimal 0.0 to 1.0)
Put a value in here and the Map will always stay at that brightness. Good for caves, dungeons or inside of houses.
Reset Map on player group death
Does what it says. When the player group is defeated, this map resets to its original state. All items return, everything goes back to how it was.
Disallow Groupsplitting
When this is checked, the player cannot split up their group on this Map. So the group always has to move together. Good for Maps with specific Events, or Event-based boss fights.
The other checkboxes are explained further down with some examples. First, a bit more about lighting though.
Map Lighting
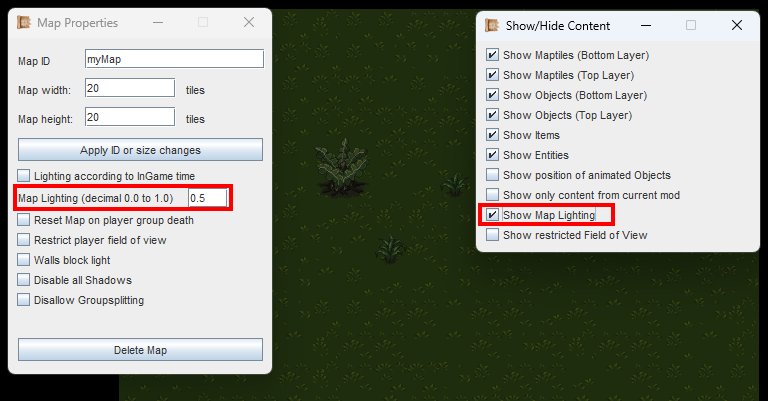
When adjusting map lighting, make sure that the Editor actually shows the light.
If you set the static Map lighting, you will notice that nothing changes in the Editor. That is because the Editor displays every Map at 100% brightness by default.
To see how it looks like in the game, use the Show/Hide Content window as shown in the image left.
Lighting Modes
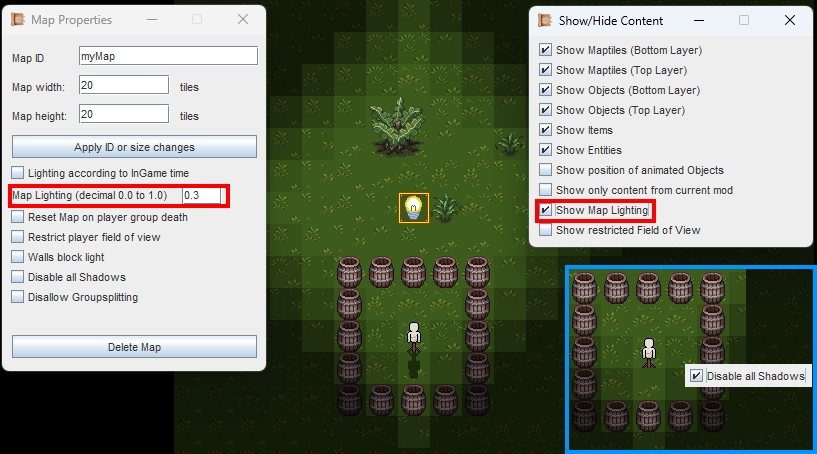
The default light shines through walls.
There are 2 light modes in the game, which affect light sources (we learn about placing them later, in Objects). The first one is default lighting, as seen on the left.
This light goes through walls, and is best suited for outside maps.
In this image, you can also see an example of Disabled Shadows, another map property. This is useful for Maps that act as UI. But that is something for when we get to Events and custom UI modes.
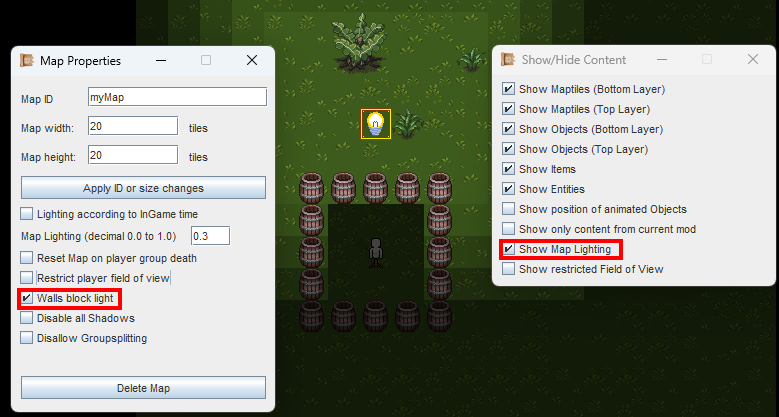
These barrels act as Walls, which block the light in this lighting mode. This configuration should not be used stand-alone, as it can look at bit weird. Use Field of View alongside.
The second light mode is 'Walls blocking Light'. This is best used for caves, dungeons and hostile inside maps, and I recommend the walls between rooms to be at least 2 tiles thick.
Also, I recommend using this together with the checkbox for Field of View, which is explained below. Otherwise it looks a bit strange, like in the image to the left.
Field of View
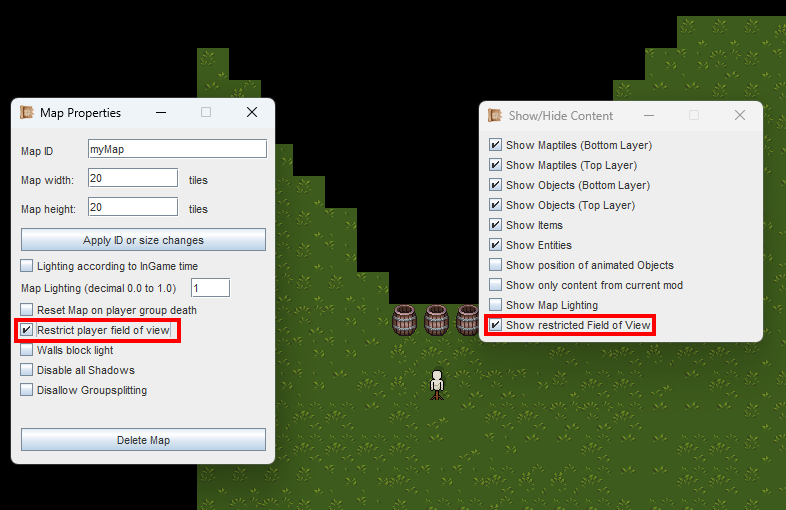
The three barrels act as Walls, which block the view of the player (symbolized by a dummy here). Make sure to activate the checkbox in the Editor to simulate this view, if you want to check how it looks like.
In some cases, e.g. in dungeons and caves, you don't want the player camera to see through walls. This is achieved with the 'Restrict player field of view' checkbox.
You can simulate this view in the Editor with the Show/Hide Content Window, as shown in the image to the left.
Testing your Map

The pause menu when started with the '-dev' parameter.
Testing your Map is the most important step. You might have missed some solidity on certain tiles, or you need to check how it looks like in the game.
I highly recommend starting the game with the '-dev' parameter, so you can access the Developer menu in the pause menu. If you missed out on this, read up on the Setup page.
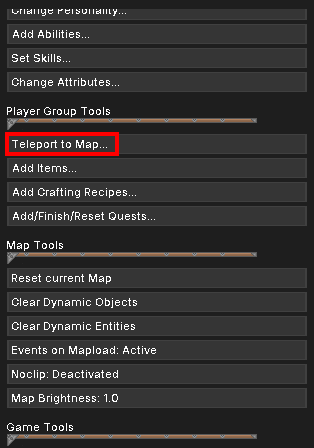
Familiarize yourself with the Developer menu when you got time.
In the Developer menu, scroll down until you find 'Teleport to Map...', then select your Map. You will always be teleported to the map center.
Should you get stuck there, you can use 'Noclip' in the Developer menu to get out.
When on the Map, you can save your game. On the next (re)start, you will be on the Map right away and can review your changes even faster.
Objects-, Items- & Entity Placement
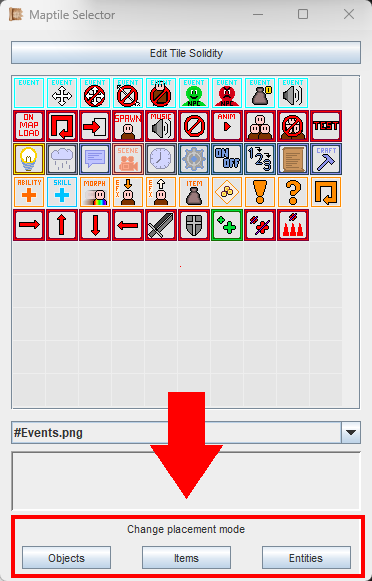
The placement modes are important for Maps. They are introduced on their own pages.
Lastly, let's loop back to the Maptile Selector Window.
Earlier we skipped the 'Placement Modes', at the bottom of the window.
These are introduced on the pages for Objects, Items and Entities respectively.
If you follow the Guide, they will be explained later, once you got a few more basics in. Don't worry, we continue step by step.
If you are following the Guide, continue with Music. We will return to the Map Tools every time we can apply something new in there.