The Editor
Dialogues
Reminder: Hover your mouse over almost any input, field, selectionbox or button in the Editor to receive tooltips and examples.
Table of contents
The Dialogue Creator
Adventures of Conquest comes with a powerful dialogue system that emphasizes the uniqueness of characters and their interactions between each other. It allows NPCs to react to a player characters personality, and to address them with their name and class. Furthermore, multiple variations of the same dialogue can be made. Let's go through this step-by-step.
As always, a unique ID is needed when creating your Dialogue.
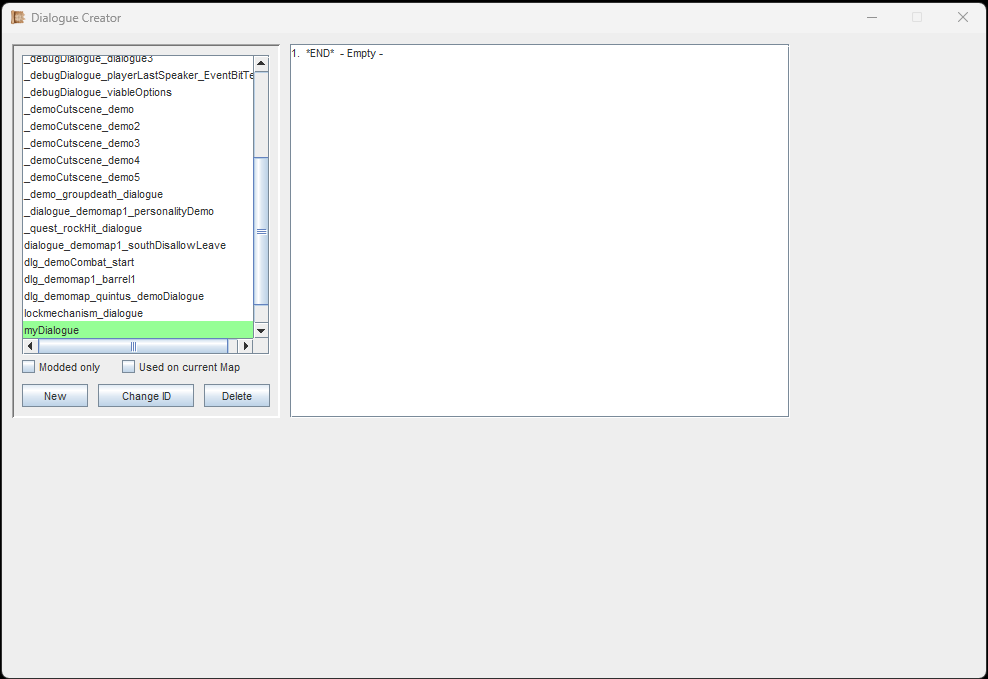
First, let's create a new Dialogue and assign a unique ID to it. The Dialogue Editor window does not show much of its UI yet, we get to that in a second.
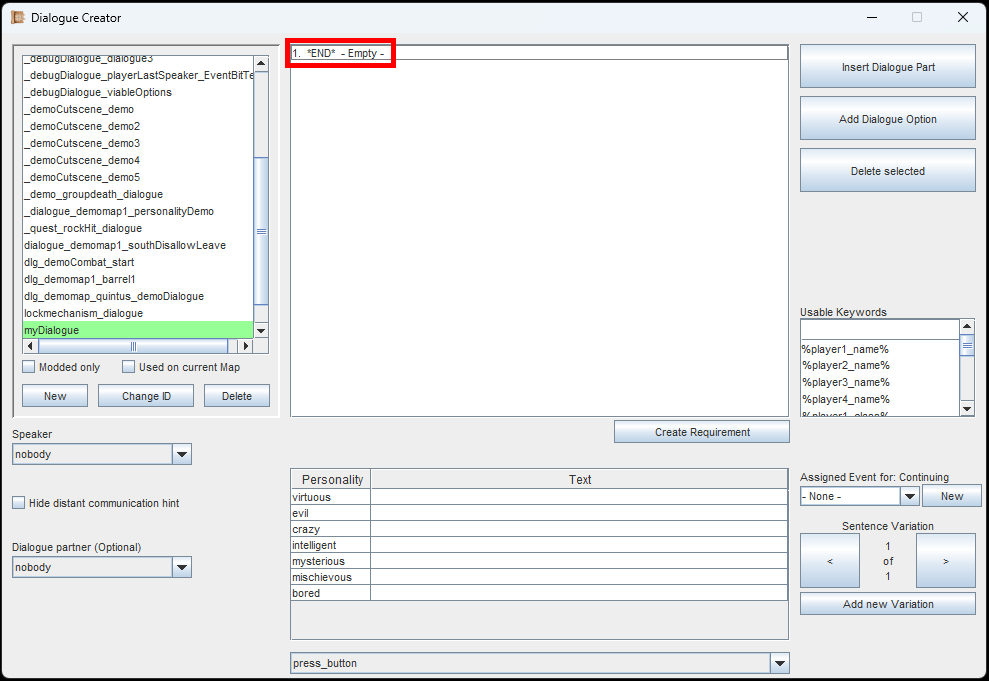
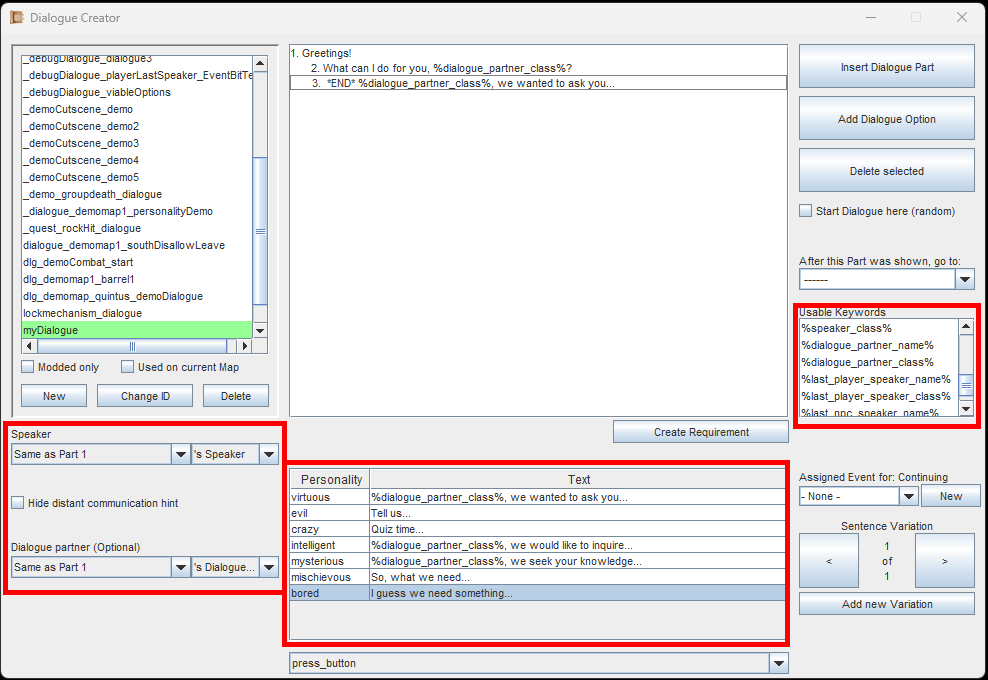
Once you clicked on the first dialogue part, other settings will appear in the window.
The top-middle part of the window is occupied by the dialogue tree. Our newly created dialogue does not contain anything yet, so the dialogue tree merely shows *END* - Empty -.
This first entry is a so-called 'Dialogue Part'. A Dialogue Part is text in a dialogue box, spoken by the Speaker.
The *END* signifies, that after the dialogue reaches this part, the dialogue will end. "- Empty -" signifies that there is no text written for this part yet.
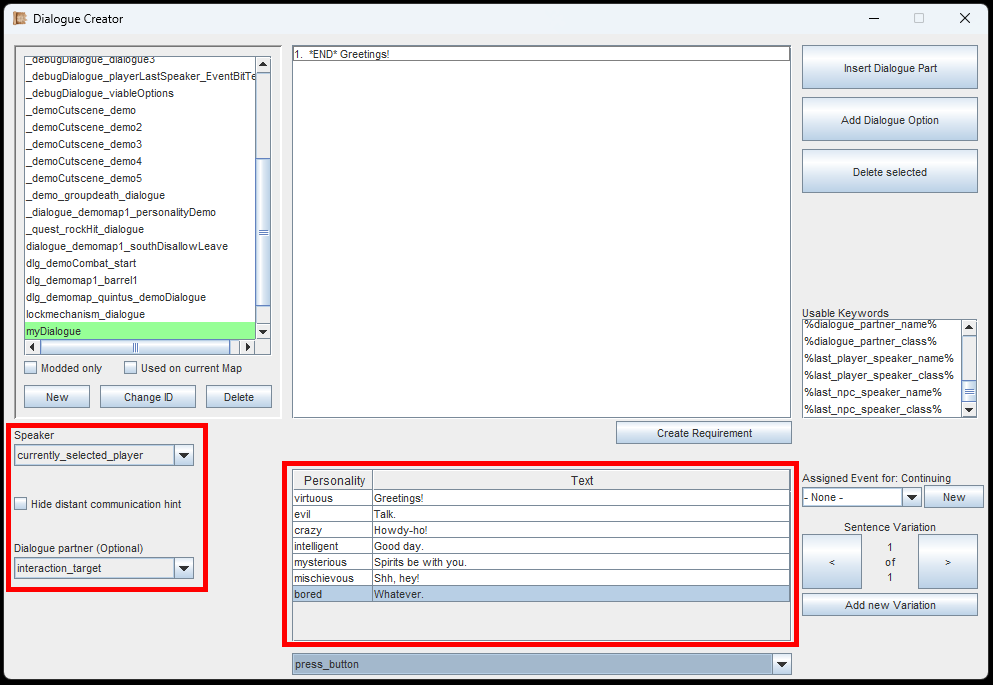
Pick a Speaker, (optionally also a Listener) and write the contents for each player personality type.
Let's select a Speaker first. This is the character (NPC or player) who will speak out this Dialogue Part. There are multiple options to pick from, more about them below.
Optionally, you can also select a Dialogue Partner (the Listener). This can also be an NPC or a player character, and is useful to have in case you want a deeper, more functional conversation. Simply said, it keeps the dialogue participants consistent, allows for them to address each other by name and class, and makes subsequent dialogue parts easier to handle.
The game will always show the portrait of the speaker in the dialogue box. Since the player group can split up, there is an in-game explanation why all player characters can still participate in a dialogue, even when far away from the dialogue partner. An icon is shown under the portrait to signify 'Distant Communication'. If the player character is physically too far away from the target, this icon will appear. Unless, it is disabled via the checkbox, below the 'Speaker' selection.
Then of course, you need to set the actual text of the Dialogue Part. Every personality gets their own lines. Player characters will use the lines that fit their personality. If their correct lines are empty, they will use a random other one if available. Simply click on the table cells to edit them.
NPCs don't have their own personality. If the Speaker is an NPC, they will pick the line that corresponds to the personality of the player character who last spoke.
The dropdown at the bottom-middle of the window has two options: 'press_button' or 'automatic'. 'Press Button' means, that the player must press the interaction key to continue with the next Dialogue Part (or close if none). 'Automatic' means, that the dialogue box will move onto the next part on its own after a certain delay. This delay can be adjusted in the game settings.
Speaker- and Listener Types
nobody
No name is displayed and the portrait is the generic dialogue box portrait. Good for gameplay hints.
currently_selected_player
The player character that is currently selected (highlighted on the right side of the gameplay screen).
interaction_target
If the player has interacted with an Entity (Interaction key or Mouse click), that Entity is set as interaction_target. Is can also be set via the 'Dialogue_Start'-EventBit.
random_player
Chooses a completely random player character, dead or alive.
random_player_alive
Chooses a completely random player character, but only if alive. If no alive player is found, it will consider dead ones too.
semi_random_player
Chooses a random (not currently selected) player character, but will avoid picking the same one as before. Only if all else fails, the currently selected player character and/or the last picked character will be considered as well. For every started Dialogue, using the Semirandom-Option three times in a row will pick every non-selected player character without picking the same one again.
semi_random_player_alive
Same as 'semi_random_player' but will try to choose a player character that is alive. Only if all else fails, it will consider dead player characters too.
semi_random_player_from_seed
Use this after you used the EventBits 'Player_Semirandom_Seed' or 'Player_Semirandom_Seed_with_exception', as these create the order.
player_with_skill
Chooses a player character who possesses the specified Skill. Picks one at random if multiple are present.
Will try to avoid choosing the same character that was talking previously, but will refer to them if no other character can be found.
player_with_ability
Chooses a player character who possesses the specified Ability. Picks one at random if multiple are present.
Will try to avoid choosing the same character that was talking previously, but will refer to them if no other character can be found.
hidden_npc
Select any NPC from the global list and their portrait will appear; However, there will not be any physical Entity present when using this.
from_GameVariable
If you saved a Player character or an Entity from the map in a Gamevariable, you can use this to refer to them; If there is more than one Entity with the same Entity-ID on the map, this will select the first one that can be found.
(personality)
Selects a player character with the respective personality type. Will try to avoid choosing the same character that was talking previously, but will refer to them if no other character can be found.
(Same as Part X's Speaker/Listener)
The speaker/listener will be the same speaker/listener as in previous Part X. You can choose which one. The Part-numbers can be seen in the dialogue tree.
Note:
If the Speaker is somehow not valid (e.g. selecting interaction_target without having interacted with an Entity first), the dialogue window will default to 'nobody'.
Speaker Concistency
Keywords make Dialogues feel more unique and special.
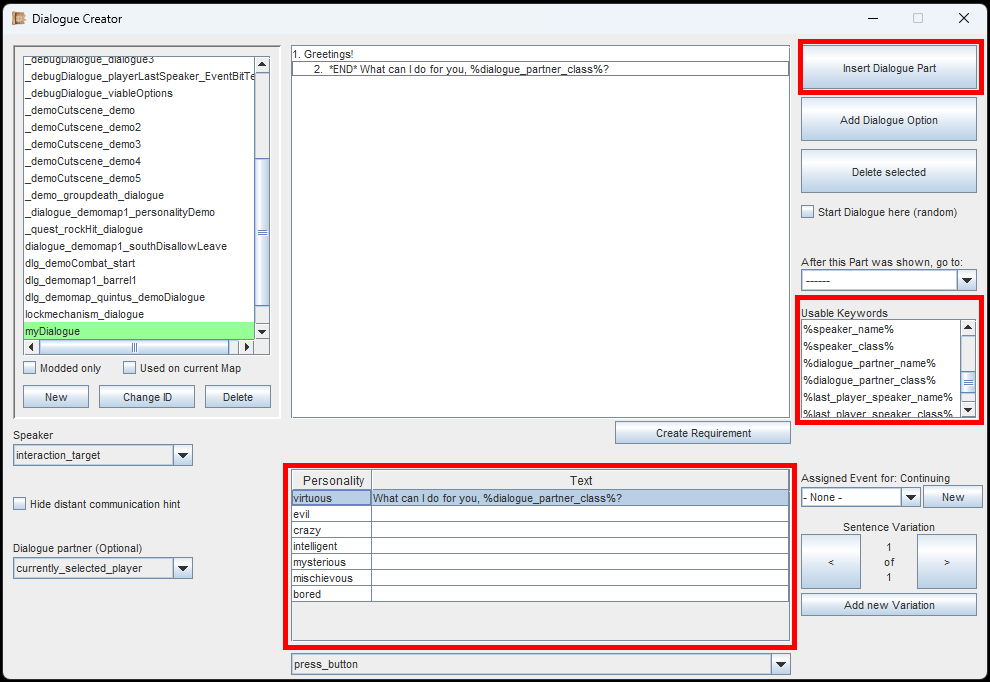
Let's add another Dialogue Part with the button at the top-right. Since you have the first Dialogue Part still selected, your new Dialogue Part will appear underneath. You can change their order with a right-click though.
In the first Dialogue Part, the Speaker was the 'currently_selected_player', and the Dialogue Partner was the NPC that we interact with. In our second part, we want that very NPC to be the Speaker instead, so we reverse the roles.
To make things even more interesting, we are going to use keywords. Simply click on them to append them to the selected content text. The game will automatically replace those keywords during gameplay.
Refer to previous Dialogue Parts' Speakers and Dialogue Partners to get your Speaker and Listener for later Parts.
The best way to keep Speakers and Dialogue Partners consistent throughout the Dialogue, is to get them from previous Dialogue Parts.
In the image to the left, you can see that we source the Speaker and Dialogue Partner both from Part 1 (the first part in the treemap).
Dialogue Options
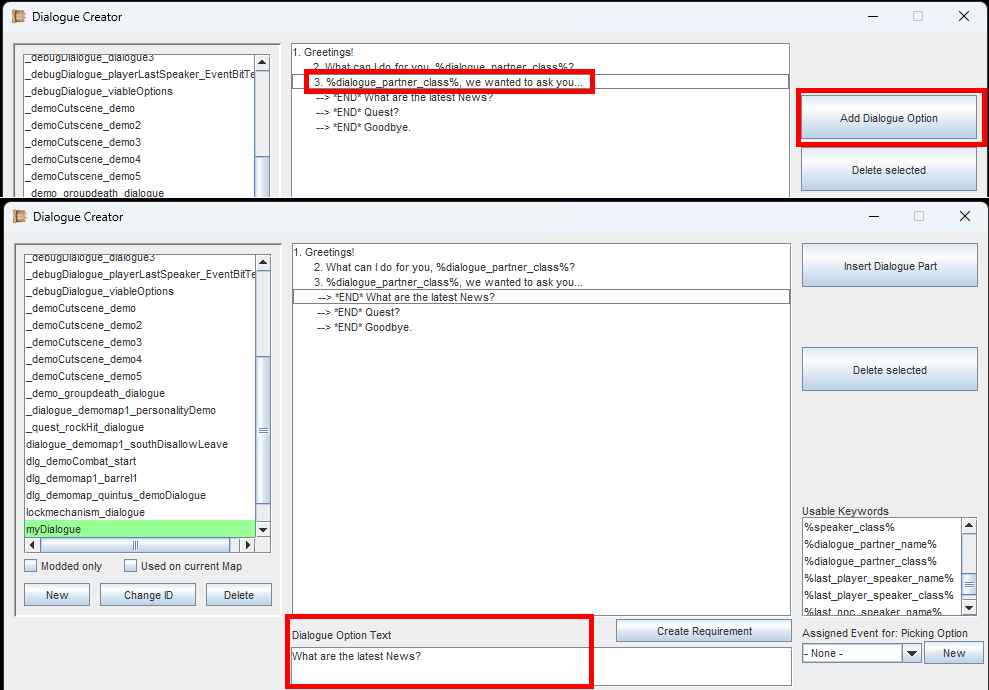
The Dialogue Option text is always the same for all characters. But you can customize the DialoguePart directly after it, to make your characters express it differently.
Every Dialogue Part can have Dialogue Options. When at least one Dialogue Option is present, the player has to select it with the mouse in order to continue. The interaction key or automatic progression will not work.
To add a Dialogue Option you have to select a Dialogue Part first. Then click on the button 'Add Dialogue Option'. Click it multiple times to add multiple Options.
When you have a Dialogue Option selected, you can adjust its text. The text for these is the same for all personalities, but it does support keywords (including GameVariable-Keywords).
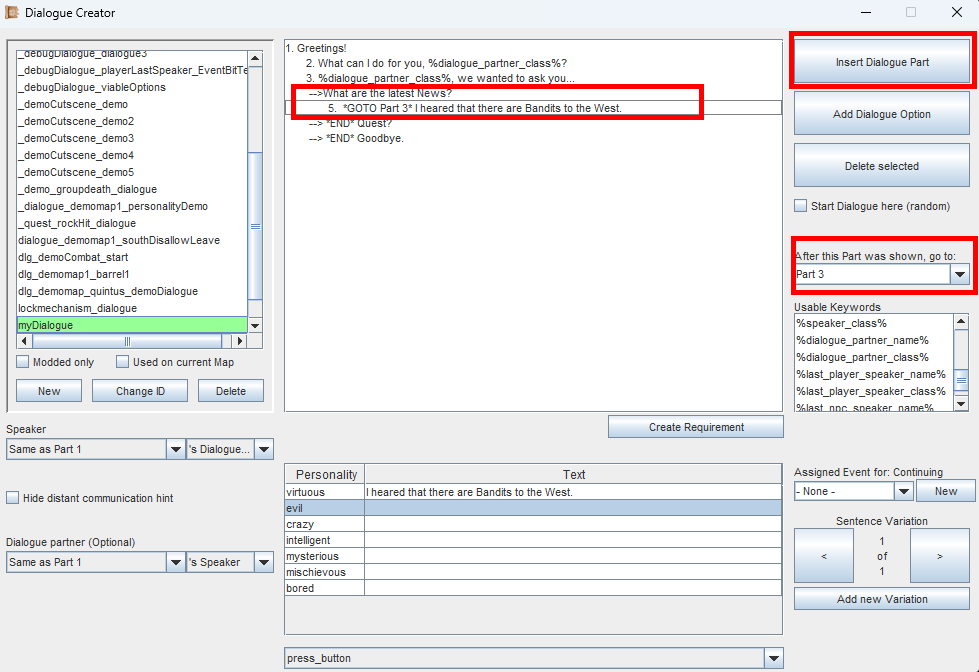
When using GOTO-Commands, you can create more complex dialogue logic.
If a Dialogue Option has nothing that comes after it, it will also show '*END*' at the beginning. This means the dialogue will end when selecting this Option.
Click on a Dialogue Option and click the button 'Add Dialogue Part'. When selecting this Option during gameplay, the Dialogue Part will be shown next. Makes sense, right?
In the image to the left, you can see that we have added a Dialogue Option and a Dialogue Part. Again, there is nothing after the Dialogue Part, so technically the dialogue would end here. But, there is another way: The GOTO-Command. Select a Dialogue Part, then look for the dropdown on the right side. Here you can select any other Dialogue Part. So once this Part has played out, we may jump back to e.g. a previous Part.
In the example to the left, we jump back to the Dialogue Part that has the Dialogue Options. For complex dialogue trees, make sure there is always a way to end the dialogue.
Sentence Variations
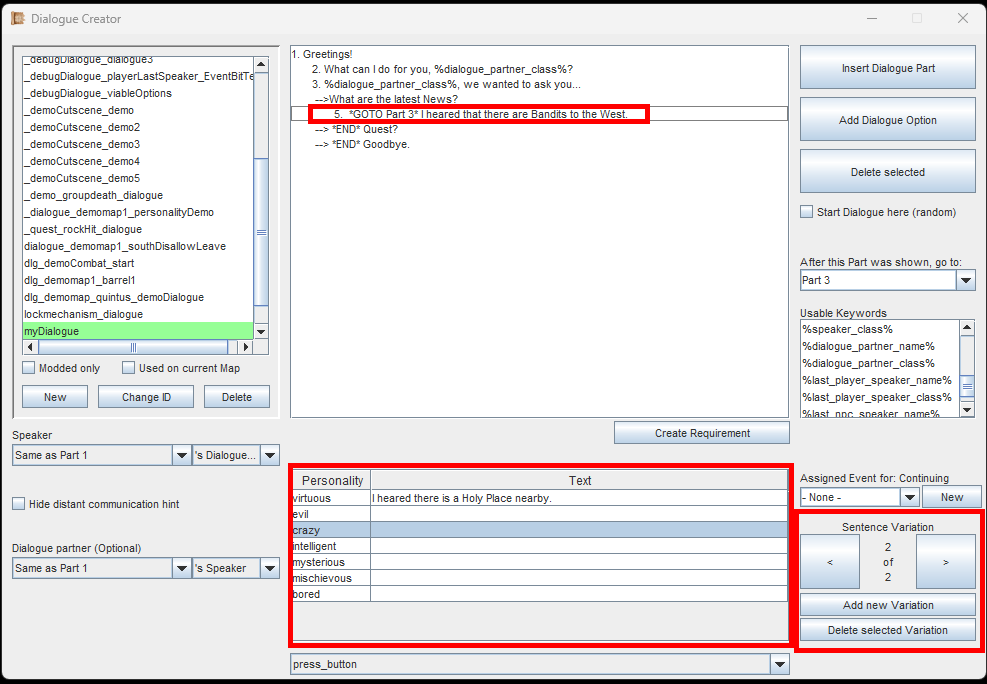
Sentence Variations are good for NPCs that you talk to often, like merchants.
One last thing you should know: Sentence Variations.
Basically, every Dialogue Part has an input for each Personality Type. But, you can also add a new Variation for this Dialogue Part.
From all the variations you create for a Dialogue Part, the game will randomly pick one. This means you can have a potential infinite amount of variations to what a character can say.
Starting a Dialogue
Assigning dialogue to an Entity or Object is easy as pie.
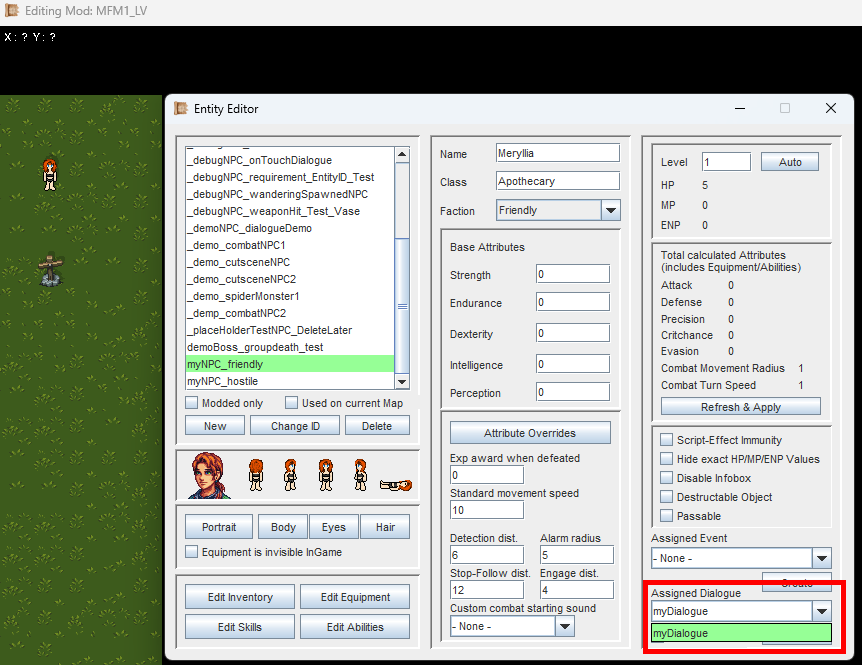
In the Editor, you can directly assign Dialogue to Entities and Objects.
In the image to the left, you can see how we add a Dialogue to an Entity directly. This dialogue will play when interacting with the Entity (pressing the Interaction key, default: Space, or left-clicking them). There is also a checkbox for making the Dialogue play when touching the Entity.
The same goes for Objects. Simply place them down in the Map Editor, then view their settings and change the dialogue.
The explanation of how it works, sounds way more complicated than it really is.
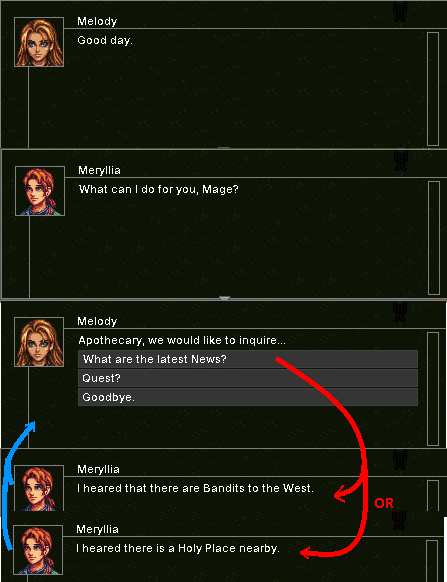
Here you can see an example of how the Dialogue from all the images above plays out.
The first Dialogue Part took the currently selected player character as speaker, and the interaction target (which is the Entity) as listener.
The second Dialogue Part then took the first Parts' speaker and listener, but reversed them.
The third Part took the same speaker and listener as the first Part, and it has 3 Dialogue Options. The first Option leads to another Dialogue Part.
The Dialogue Part that comes after the first Dialogue Option has 2 Sentence Variations, which will show up randomly. Once the Dialogue Part is done, it has a GOTO-command back to the previous Dialogue Part with the 3 Dialogue Options.
If you are following the Guide, continue with Requirements.