The Editor
Mod Configuration
Table of contents
Configuring your Mod
Time to open up the Editor configure your mod. This only takes a few minutes and should always be done before you do anything else in the Editor. If you have read the part on How to Install Mods, you may know that you, or whoever downloads your mod, can rename the folder of your mod without breaking any dependencies. This is possible, because what makes your mod unique and distinguishable, is in the Mod Configuration.
Opening the Configuration in the Editor
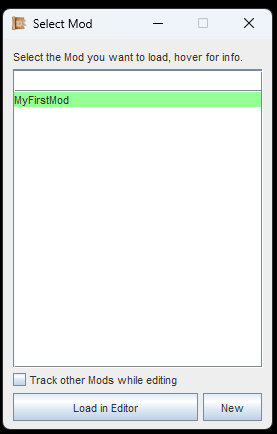
Select your mod folder from the list and then load.
- Start up the Editor with the Shortcut you made earlier (see Setup)
- Select the mod folder that you have just created (see image)
- Ignore the checkbox, that is for Coop-Modding, not relevant for now.
- Click the button 'Load in Editor'
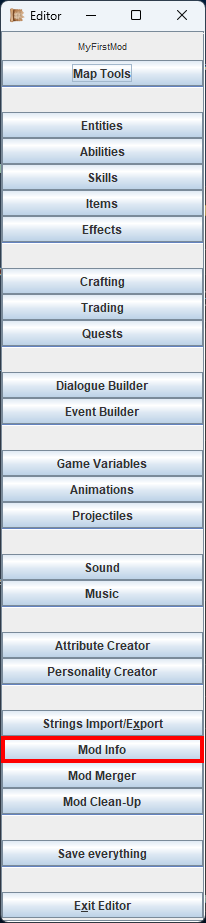
The menu isn't fancy, but it works!
The Editor's main menu will appear. It's nothing fancy, no symbols, just text, but this way its a bit easier to understand :)
We will go through all of these buttons in the Functionality Overview later, so for now we ignore these and go straight for 'Mod Info'.
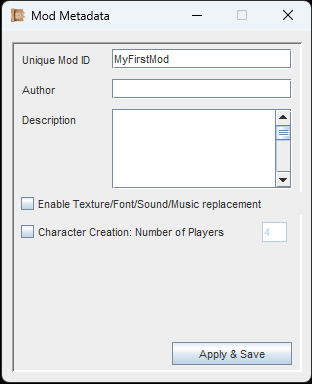
This is where we configure your Mod. Also known as the mod meta data.
Let's go through these one by one. Something to remember: If you hover over any interactable elements in the Editor, it will show you Tooltips that explain everything!
Unique Mod ID
This is what identifies your mod, its 'real' internal name of sorts. If any other mod has a dependency on it, it will look for this very Mod ID here. Make sure that this ID is unique, otherwise other mods with the same ID will collide with this. You can rename it later, but keep all of this in mind. Right now, the ID is the same as the folder name of the mod. These two however are independent. Change both to whatever you see fit.
Example: Folder name is 'MyFirstMod' and Mod ID is 'MFM_YourNickname'.
Author & Description
Simple enough, you can put your name in here and describe the mod. This is not really displayed anywhere, but will remain in the mod metadata, and anyone can check this.
Enable Texture/Font/Sound/Music replacement
This is where things get interesting. If you mark this checkbox, your mod can replace existing vanilla game textures, fonts, sound and music. You can basically make a texture pack this way, or when doing a complete overhaul mod, this can make the whole UI look different.
How it works:
1. You go into the directory where your game is installed, and into the 'data'-folder.
2. Find the texture/audio file you want to replace and copy its name.
3. Put your own file in your own mod folder, at the same corresponding location, and give it the same name.
Example: We locate /data/gfx/gui/info_coin.png and note down the file name.
Then we go to /mods/MyFirstMod/gfx/gui/ and add our own 'info_coin.png'.
There is only 1 special case: If you add a new font (.ttf file), you don't need to change its name. The game will simply take the first file it can find.
Character Creation: Number of Players
Yes, with this you can change the number of player characters at the start of the game, 1 to 4. Either have them this way permanently, or add pre-made characters to the group later on with Events.
Important: Your mod needs to account for the new number of players in Dialogues, Events and for the character creation UI.
Make any changes as needed, then 'Apply and Save'. If you have changed your Unique Mod ID, the Editor will force a restart. In any case, this is all you need to know about configuring your Mod!
If you are following the Guide, continue with the Editor's Functionality Overview (Explanation of what all the buttons in the Editors menu do).